


A correctly fitted helmet sits level, roughly two finger widths above your eyebrows and stays snug enough that the skin on your forehead moves when you nudge the shell. If it slides, tilts back, or rolls forward when you fasten the strap and give it a firm push, the size or model is wrong, no matter how good the measurement looked on paper. Confirm fit with a real test on your head, not just a tape measure and a size chart.
TL;DR:
- Proper helmet fit depends on both correct size measurement and accurate positioning, with the front rim roughly two finger widths above the eyebrows.
- Wear the helmet with the same hair and headgear you’ll use during your ride to ensure an authentic fit, and always validate fit with physical checks like the skin-move and roll-off tests.
- Adjust straps to form a Y shape just below each ear and tighten the chin strap so only two fingers fit, ensuring a snug but comfortable hold.
- Helmets should not shift more than about one inch when pushed, and they must stay properly aligned during dynamic tests to provide effective protection.
- For best safety, always replace helmets after any impact or around five years of use, and verify fit regularly for kids and older riders whose head size or shape may change over time.
Grab these before you start:
Measuring with glasses on, or with a skull cap or balaclava you’ll wear on cold rides, changes the number enough to matter. Fit yourself the way you’ll actually ride. Once you have a circumference, treat it as a starting point, not a final answer. Every brand runs its own manufacturer’s size chart, so the same measurement can land in different size bands depending on which helmet you’re trying.
Getting the number right is the first real step in any helmet sizing guide, and it takes less than a minute.
Once you have your number, compare it against typical adult ranges: Medium runs about 21.75 to 23.25 inches, and Large covers roughly 23.25 to 24.75 inches, according to REI’s fitting guide. Anything above that generally lands in Extra Large. These bands shift slightly by brand, so measure first, then check the specific chart for the helmet you’re considering rather than assuming Medium means the same thing everywhere.
Position matters as much as size. A helmet that’s sized correctly but worn wrong still leaves you exposed.
The front rim should sit level, roughly two finger widths above your eyebrows. Push it any lower and you block your line of sight. Push it back toward the crown of your head and you leave your forehead completely uncovered in exactly the spot that takes the hardest hits in a forward fall. Your eyes should land near the center of the eye opening when you look in a mirror straight on.
Watch for two common mistakes: helmets that tip backward off a rounded skull, and helmets that get shoved forward until they nearly touch the eyebrows. Neither is correct. If the shell bumps your glasses every time you look down, or the front edge creeps into your field of view, that’s a sign the pads need adjusting, or the model simply doesn’t match your head shape. Don’t force it. Trying a different shell is often faster than fighting a helmet that won’t sit right.
Strap adjustment is where most riders lose points on an otherwise decent fit. It’s also the fastest thing to fix.
This setup matches the guidance from Portland’s Bureau of Transportation, and it’s the same check we walk tourists through before every guided ride. Straps that look secure sitting still can loosen fast once you’re pedaling, so recheck them after the first few minutes on the bike.
Measurements and strap adjustments get you close. These physical tests confirm whether the helmet will actually protect you.
You’ll see this shorthand called the “2-2-2” or “2-4-1” check by different sources: two fingers above the eyebrows, two fingers of space at the chin strap, and roughly a one-inch tolerance on movement. The exact numbers repeat across guides for a reason. They’re the minimum you should verify on every helmet before you trust it, according to Helmets.
Pro Tip: Do the skin-move test with your eyes closed. It’s easier to feel the shell drag against your forehead when you’re not distracted by watching it in a mirror.
Most helmets built for adjustability include a rear dial or ring that tightens an internal cradle, plus foam pads you can swap or reposition. The dial handles overall snugness around the crown. The pads handle pressure points and gaps at the temples or the back of the skull.

Head shape varies more than most riders expect, and two people with an identical 22.5 inch circumference can need completely different helmets because one skull is rounder and the other more oval. That’s why trying on multiple models matters more than trusting the tape measure alone, a point Snell’s helmet guide makes clearly. If a helmet pinches at one spot but is loose everywhere else, moving a pad to that corner often solves it. If it’s uniformly loose, swap in a thicker pad set rather than overtightening the chin strap to compensate.
Pro Tip: Fit and measure with whatever you’ll actually wear riding. A helmet dialed in bare headed can feel noticeably tighter over a winter skull cap, or looser if you normally ride with a low ponytail tucked at the base of your skull.
Replace a helmet immediately after any significant impact, even if the shell looks fine from the outside. The foam liner compresses to absorb energy, and that protection doesn’t reset once it’s used.
Beyond crash damage, most manufacturers recommend replacement around the five-year mark, depending on how much sun and heat exposure the helmet has seen, based on guidance from ABUS’s helmet care instructions. Check straps and buckles regularly for fraying, clean the shell with mild soap and water, skip solvents entirely, and store it out of direct sunlight so UV exposure doesn’t quietly degrade the foam over time.
Run through this before you clip in, every single time:
If anything slips, pinches, or feels off during that half minute, stop and readjust using this luxury travel checklist to ensure your trip is flawless from the start. A helmet that feels fine standing still can reveal problems once your head starts moving with the road.
Pressure points usually show up at the temples or right above the ears, and they’re almost always a pad problem rather than a size problem. Before sizing up, try repositioning or swapping the included pads. Moving a slightly thicker pad to the exact spot that hurts often resolves it without changing anything else.
A loose fit feels like the helmet shifting when you turn your head, or spinning slightly on the crown even with the chin strap tightened. First, check whether the retention dial is actually cranked down. Riders frequently blame the size when the dial is only half tightened. If the dial is maxed out and it’s still loose, the helmet is too big. Size down or try a different brand’s Medium, since pads compress only slightly over time and aren’t designed to be a long-term loosening fix.
Tilting (usually backward, off a rounded skull) points to a mismatch between your head shape and that particular shell’s internal geometry, not a strap issue. Tightening the chin strap harder won’t fix a helmet that’s structurally sitting wrong. Try adjusting the rear dial to a lower occipital position if the helmet has that feature, or move to a model with a rounder internal profile.
A helmet that constantly rides forward into your eyebrows often means the rear cradle isn’t gripping the back of your skull. Loosen the front pads slightly and tighten the rear dial to shift the balance point backward. None of these fixes require buying a new helmet first. Work through pad and dial adjustments before assuming you need a different size.
The core principles, level positioning, snug crown fit, a secure Y-strap, carry across every helmet category. The details underneath differ enough to matter.
Cycling helmets prioritize ventilation and low weight, so they use thinner foam and rely heavily on the rear retention dial to hold position. Motorcycle helmets are heavier, fully enclosed, and fit much closer to the face and jaw. A size that feels correct on a bike helmet will often feel loose in a motorcycle shell because the fit points are different. A road cyclist casually shopping for a motorcycle helmet based on their bike helmet size is a common, avoidable mistake.
Climbing helmets sit higher on the head to leave room for a headlamp and need enough adjustability to fit comfortably over a beanie in cold conditions. Fit checks focus less on the wall test and more on whether the helmet stays put during an upside-down fall, since climbing falls don’t follow the same forward trajectory a cycling crash does.
Ski helmets are built to integrate with goggles, so fit checks have to include the goggle strap and confirm there’s no gap at the forehead where the two meet. Buy any of these categories based on a cycling helmet measurement and you’re guessing. Each category has its own manufacturer size chart, and the safest approach is always fitting and testing within the category you’re actually going to use.
Certification standards, like those from Snell or the U.S. Consumer Product Safety Commission (CPSC), don’t just test impact absorption. They also validate that a helmet’s retention system can hold the shell in the correct position through an impact, not just sit comfortably on a stationary head.
A helmet that passes CPSC testing has been checked for strap strength and shell coverage under load, conditions a standing fit check can’t fully replicate. That’s part of why the fit tests in this guide, skin-move, roll-off, wall test, matter as much as the certification sticker itself. Certification confirms the helmet is capable of protecting you if it fits. It says nothing about whether the specific unit on your head right now is actually adjusted correctly.
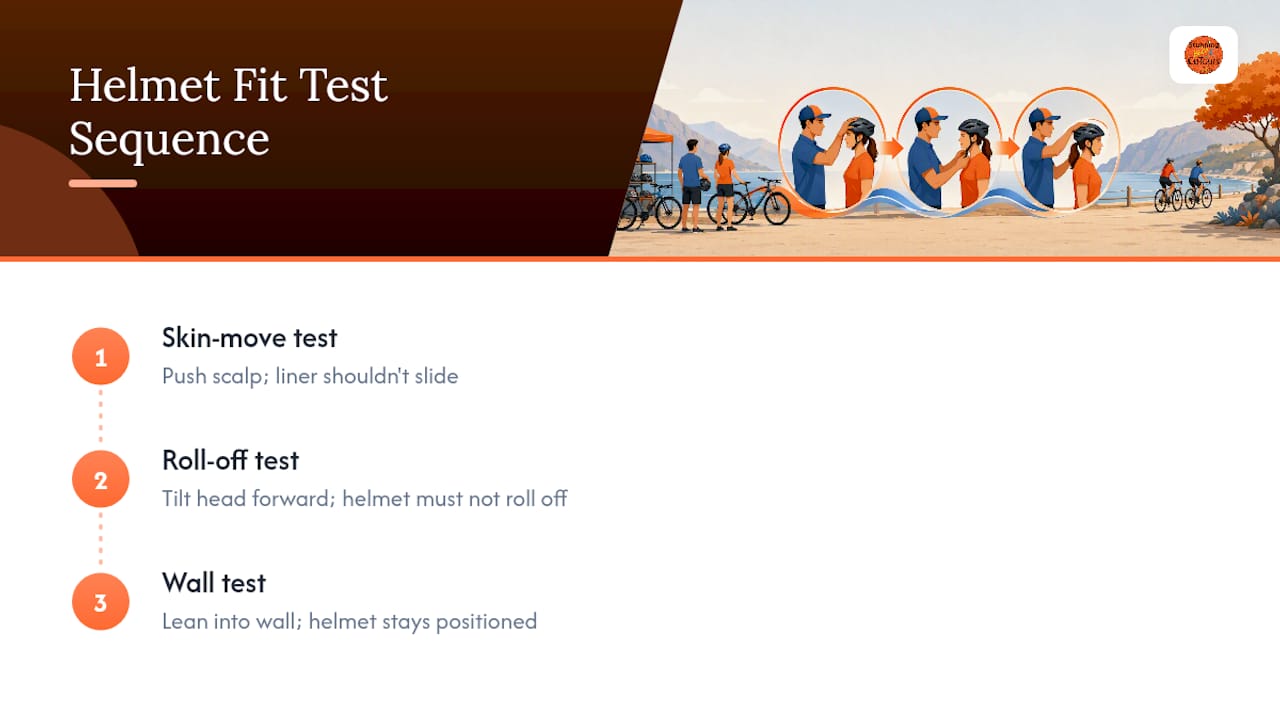
This is also the reasoning behind trying multiple certified models rather than assuming any Medium from any certified brand will fit the same. Snell’s own fitting guidance is direct on this point: head shape varies enough that certification and correct sizing are two separate checks, and skipping either one leaves a gap in your protection.
A helmet’s entire safety case depends on it staying in the correct position at the moment of impact, which makes fit a performance variable, not a comfort preference.
A helmet that’s tilted back exposes the forehead exactly where forward falls concentrate the most force. A helmet that shifts sideways on impact can miss the intended impact zone of the foam entirely, transferring energy somewhere the shell was never designed to absorb it. The skin-move and roll-off tests exist because a helmet that passes them is far more likely to stay in its designed position when it actually matters.
This is the practical argument for treating fit checks as mandatory rather than optional. A $200 helmet fitted poorly protects you less than a $60 helmet fitted correctly and positioned where it’s supposed to be. Size charts, certification labels, and retention systems all exist to support one outcome: a shell that stays exactly where it started when your head meets the ground.
Kids’ heads grow fast, so the biggest mistake is buying a helmet with room to grow and letting a child ride in something oversized in the meantime. Measure every few months rather than assuming last year’s size still fits, and use the same eyebrow and two-finger checks you’d use on an adult. Kids also tend to push helmets back off their foreheads out of habit, so it’s worth checking position mid-ride, not just before setting off.
For seniors, thinner hair or changes in head shape over time can make a previously snug helmet feel loose, so it’s worth reconfirming fit rather than assuming an old helmet still performs the way it did years ago. Balance concerns also make the retention tests more important, not less. A helmet that shifts during a stumble offers less protection exactly when stability matters most. If arthritis or grip strength makes the standard chin strap buckle difficult, look for models with magnetic or easier-clasp closures. The comfort upgrade also improves the odds the strap actually gets buckled every ride instead of left loose out of frustration.
Fitting helmets for a couple riders is a five minute job. Fitting them for a group of tourists with wildly different head shapes, several languages, and zero familiarity with the size chart on the wall is a different skill entirely.
Rental staff who fit helmets daily learn to spot problems fast: a pad that needs moving to one temple, a dial that’s only half turned, a rider who grabbed a helmet a size too small because it “looked right.” The retention checks in this guide, the rotate test, the roll-off test, are the same ones staff run in seconds before handing a bike over. For travelers trying our audio-integrated helmets for the first time, that extra pair of hands matters. Getting the fit right before the audio guide even starts means the ride opens with Como’s shoreline in view, not with someone stopping to readjust a strap.
— Andrea
Self-fitting works well once you know the checks. If you’d rather skip the tape measure entirely, rental services fit every helmet by hand before you ride, using the same retention checks covered above, so you step onto the bike already dialed in.

Every helmet in our fleet gets checked for strap wear, shell condition, and pad fit before it goes out the door, and our staff will run the two-finger and roll-off tests with you on the spot if anything feels off. We also offer audio-integrated helmets on select tours, giving you multilingual route narration without fumbling for a phone mid-ride, check out the audio-helmet option if that sounds useful for your trip. One thing worth knowing before you go looking: some rental shops may be tucked inside shopping halls just off the street, possibly easy to miss unless you’re watching for an illuminated bike display in the window. Look for the glow, not necessarily a storefront right on the sidewalk. If you’re planning a ride around Lake Como, book your bike or guided tour and let staff handle the fitting before you set off.
It’s shorthand for three checks: two finger widths above your eyebrows for helmet position, two fingers of space under the buckled chin strap, and roughly two seconds to verify the helmet doesn’t shift when you rock it side to side.
Measure your head circumference about one inch above your eyebrows using a soft tape or string, then compare that number to the manufacturer’s specific size chart, since ranges like Medium at roughly 21.75 to 23.25 inches vary between brands.
It’s a variation on the same idea as the 2-2-2 rule: two fingers above the eyebrows, four fingers or roughly one inch of allowed movement during a push test, and one strap that meets in a clean Y under each ear.
A 24 inch measurement typically falls in the Large range for most adult helmets, but confirm against the specific brand’s chart before buying, since some Large ranges top out closer to 24.75 inches and others start sizing Extra Large sooner.
Tight enough that no more than two finger widths fit between the strap and your chin, and tight enough that you feel the helmet pull down slightly when you open your mouth wide.